

What Size Router Bit For Dado Jig
Desire to learn how to make a simple dado jig? Hey Sawdust Girl Readers! Happy New Year! It'due south SG Squad member, Timisha here from ToolBox Divas. Information technology has been a while since we last chatted. The holidays are a corking fourth dimension to spend with family and unwind. I can honestly say I did absolutely Zero. And I ate EVERYTHING.![]() Just now that the holidays are over, its fourth dimension for a nutrition and it is time to get dorsum on rail and get back into the workshop. And then this month nosotros are working on jigs. The team was tasked with coming upwards with woodworking jigs nosotros could apply in our store. I decided to develop a jig for my palm router. I take a larger router and a router table. All the same, it's a huge hassle to get it all gear up and change out the bits. So I like using my palm router when possible. Problem is, it's a fleck of a challenge keeping the cuts directly and creating dado slots. I want to be able to do more dado joinery in future builds. And so in this postal service, I am going to evidence you how I adult a simple jig for cutting dados with my trim router.
Just now that the holidays are over, its fourth dimension for a nutrition and it is time to get dorsum on rail and get back into the workshop. And then this month nosotros are working on jigs. The team was tasked with coming upwards with woodworking jigs nosotros could apply in our store. I decided to develop a jig for my palm router. I take a larger router and a router table. All the same, it's a huge hassle to get it all gear up and change out the bits. So I like using my palm router when possible. Problem is, it's a fleck of a challenge keeping the cuts directly and creating dado slots. I want to be able to do more dado joinery in future builds. And so in this postal service, I am going to evidence you how I adult a simple jig for cutting dados with my trim router.
How to Make a Dado Jig for Palm Router
Materials
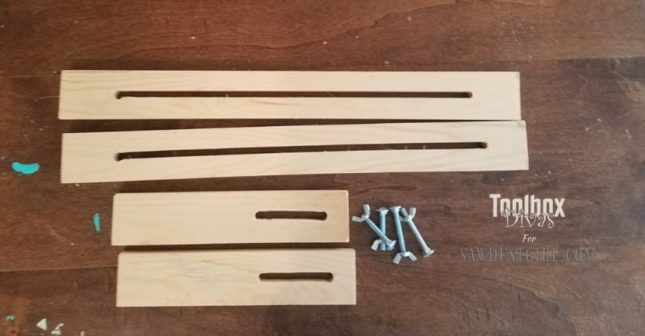
- 1 – 1x3x6 Foursquare edge Premium Lath
- four – 2" ¼ Carriage bolts
- iv – ¼ Wingnuts
- four – i ¼ screws
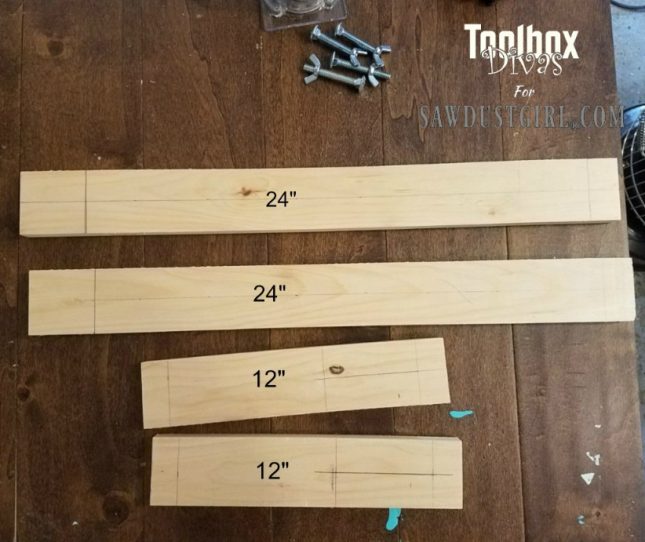
Cutting Listing
- 2 – 24"
- 2 – 12"
I wanted to brand a jig that would be flexible and handle boards of various widths and thickness. I too wanted to use what I had on manus. When I think of a shop jig it should be something made using material that is easily accessible and information technology shouldn't be too complicated. OK, Let'southward Become Dingy!
The Process
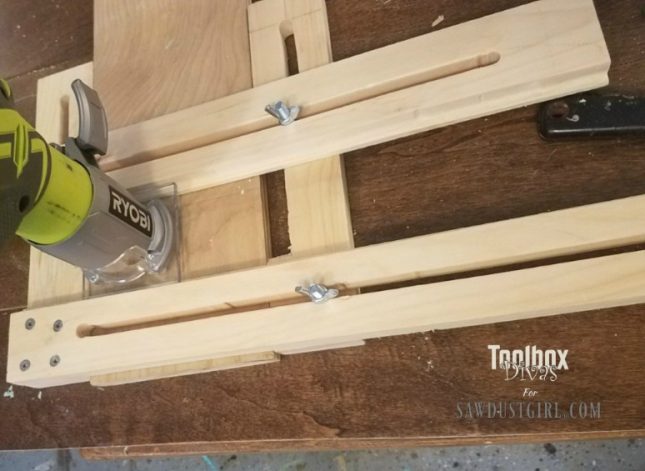
- I started by cutting the 1×3 to size. Then using a ruler I marked a line down the middle of the boards for the slots. Here is a quick tip to check if y'all marked a directly line: Using a laser level, like this Bosch Cocky-Leveling Cross-Line Light amplification by stimulated emission of radiation Level, place it at the caput of the lath and on a apartment surface. If the laser lines up with the line, it is straight.
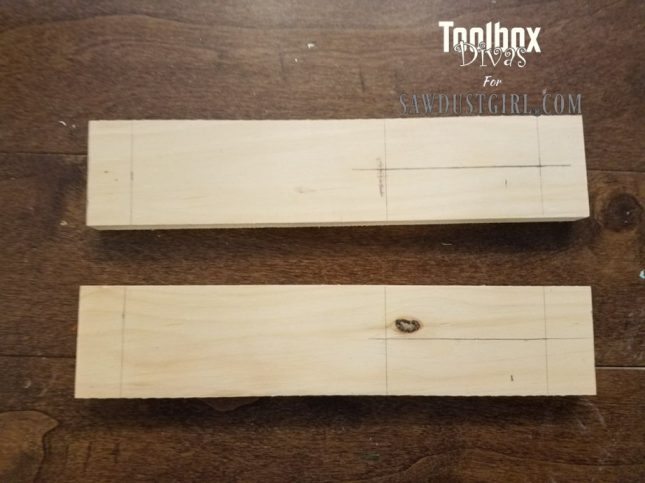
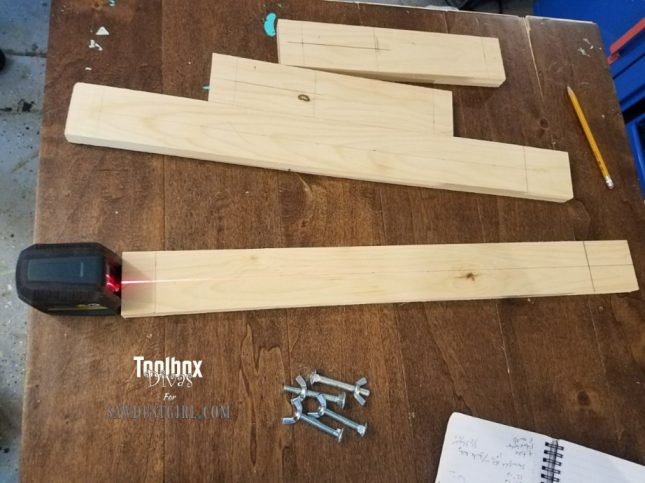
- Drill a hole into the board with a drill flake that is wider than the router bit you'll be using to make the slot. I used a ½" drill bit. The router scrap that I used to make the slots was a ⅜ inch straight fleck.
-
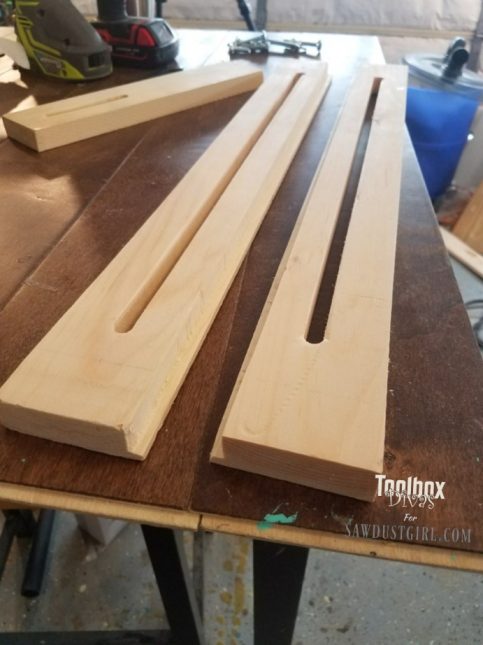
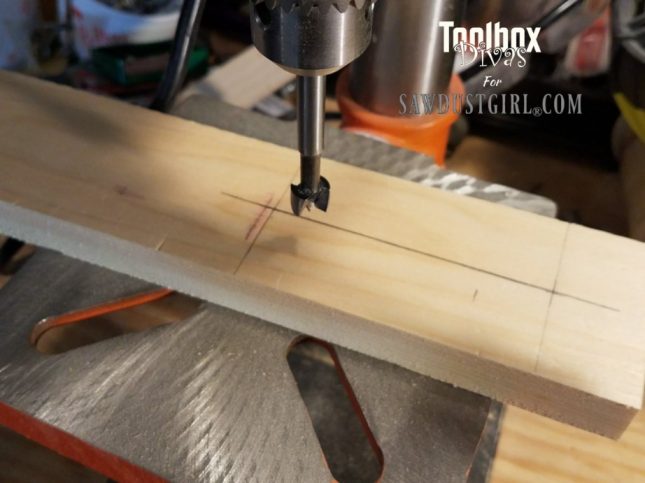 Using the router cut the slots for the bolt to pass through on the boards. To create the slots I initially I tried making apply of a couple of tips I saw online for the easiest way to create a routed slot. One way was to take a drill press and to drill all the way down the line that you lot want to route and then y'all go back in and clean it up with the router. Let me just say, I hated that process, so I scrapped it.
 Then I had a genius thought that I would just drill two holes at either ends of the slot would be and I'd route from one terminate to the side by side with the palm router to create the slot for the bolts.
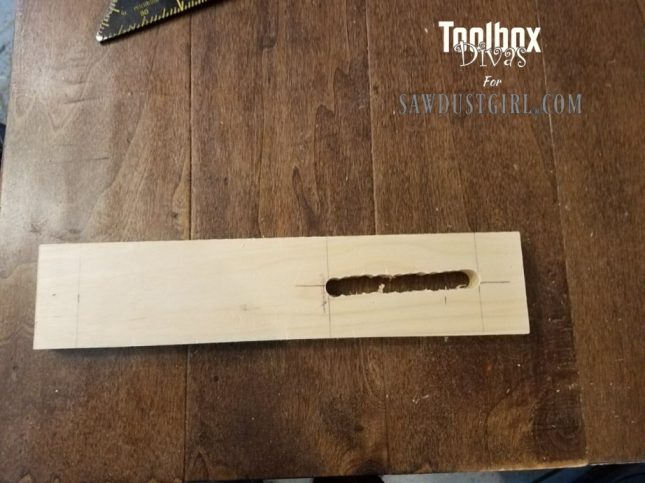
 This was the result. It was a full disaster. Even with a board as a fence, my hands are just not steady and for some reason, my contend wasn't that keen either. Needless to say at the end of the day, I had to actually break out the router tabular array to create the slots. I know the objective of this job was to reduce having to break out the router table. Simply in social club to create the jig to create dados my palm router wasn't going to cutting it, at least non even so. The slots were created with ease using the router tabular array.

I gear up the router table and insert the bit into the opening that I had drilled with the drill press and I cut open the slot. When working with a small-scale piece of wood similar this, I highly recommend using an detail like a Featherpro so that it reduces the kickback from the wood and the wood actually stays downwards while yous're running it through the router. You want your slot to be as smooth and every bit straight every bit possible. This is of import and so that you lot can run your bolt up and down the slot tightening the jig for different size material. For the ii 24in boards I ran a slot downwards almost the entire length of the board. For the 12in. boards, I ran the slot down well-nigh ⅓ of the.
 iv. Route a ledge for the palm router to sit on on the 2 24in. boards. I should too note that this jig I am making is specifically geared towards the Ryobi palm sander. When creating your jig customize it to your palm router to ensure that the measurements are geared toward the bottom guard of your palm sander.
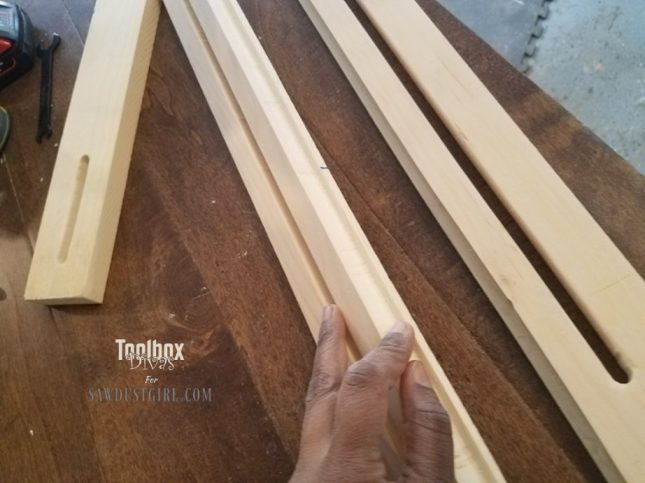
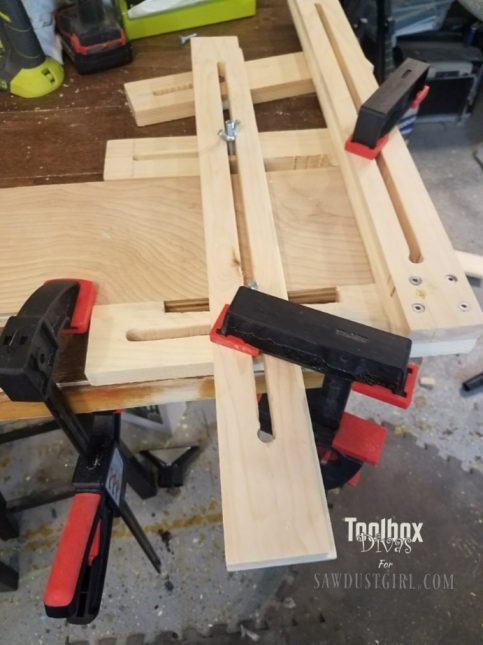
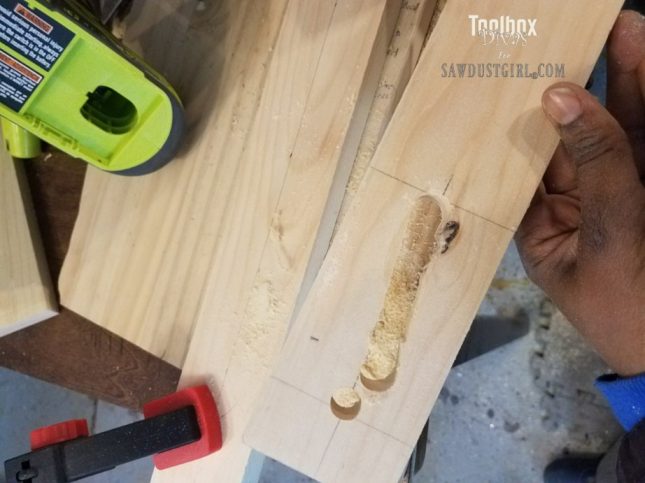
v. Assemble the jig. One time everything was cut information technology was time to beginning assembling the jig. Using a speed square I lined up one of the 24-inch boards with the 12-inch boards placing the 24-inch lath on peak of the 12-inch lath. Before screwing in the screws I went ahead and drilled holes where the screws would go to reduce the likelihood of the board splitting.
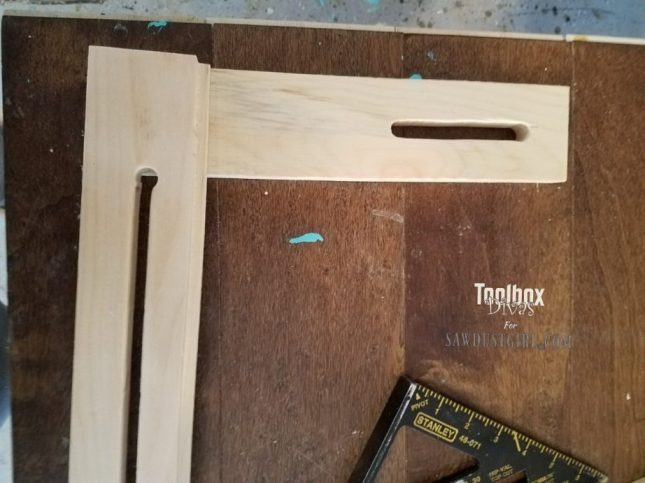
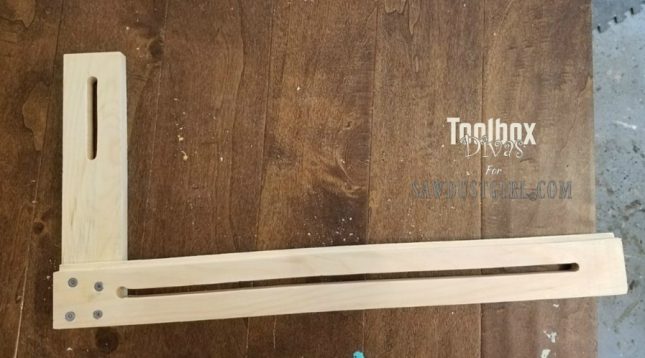
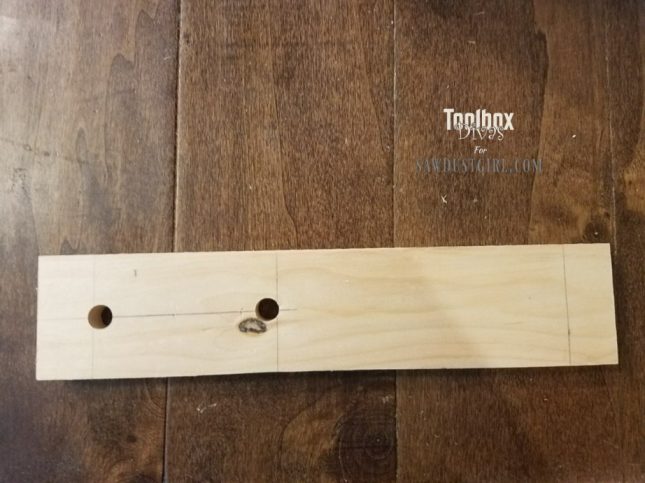
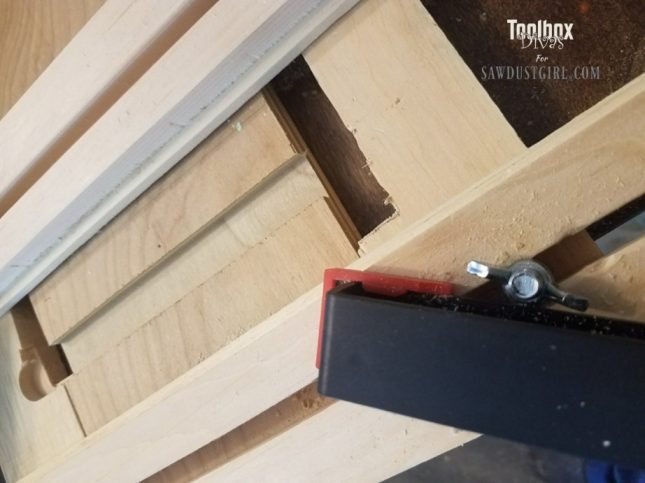
So I realized once I had all of my boards and everything in place I take no way of placing the router into the crevice of the jig. So I went back and cut an opening into the 2 12in. boards using my jigsaw. I cut a piffling opening to friction match the largest flake that I would probably utilize to create dados, which is a 3/4 inch router bit.

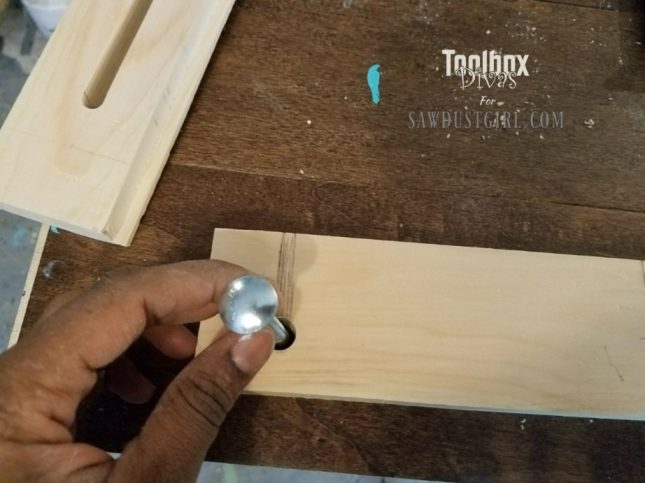
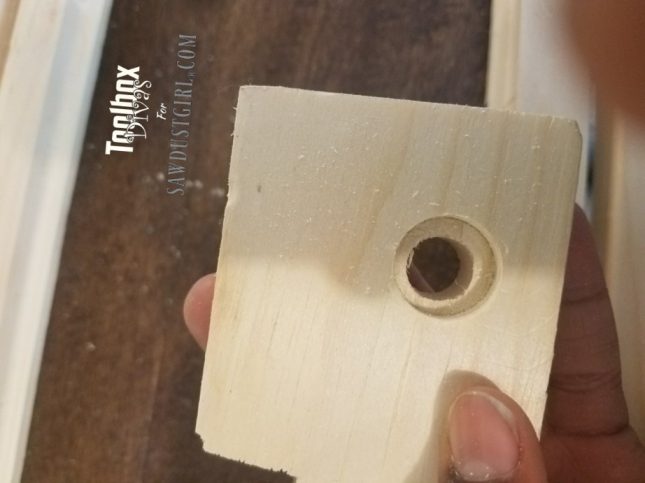
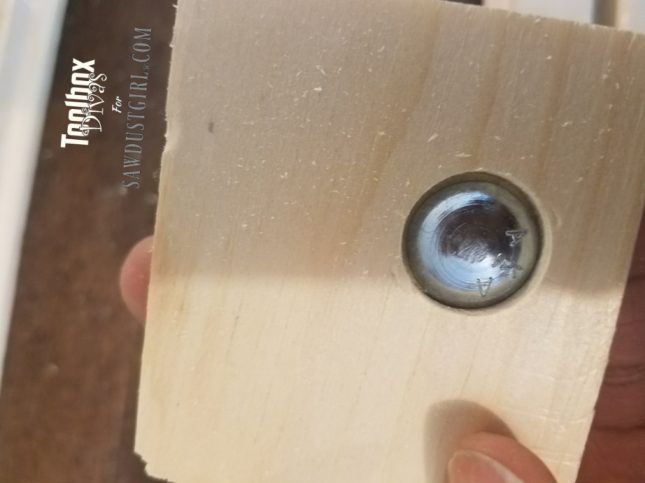
I drilled a hole into the second 12-inch lath for the bolt to fit into. I then uncovered another surface area where I needed to make some changes. In guild for the jig to sit apartment on the workbench the bolts needed to be recessed into the wood. And so using the drill press over again and a forstner bit that was 3/4in., I drilled a pigsty further into the wood and then that the commodities caput would rest apartment into the i×iii. Then I went dorsum on the lesser side of boards with a larger router bit about ane/2 the depth of the board to create recessed slots. Now the bolts could move up and down the boards flush with the boards in the slots.
6. Clamp the jig and the board to the workstation and tighten to fit your router and wood.
With everything lined up, it was fourth dimension to put this jig to use and to see if information technology works. I clamped it to my workbench making certain that everything was square. Making sure that the workpiece I was using was also clamped to the workbench. I tested it using a scrap slice of three/iv″ and 3/iv″ router scrap to create a dado.
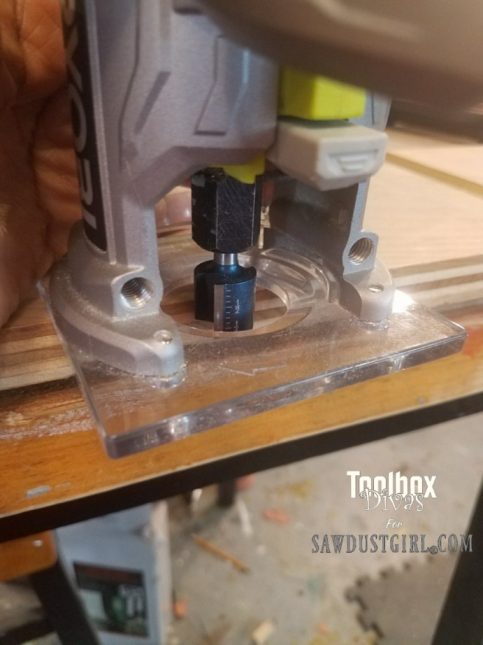
I absolutely beloved these Bosch laser depth router bits. The cuts were then clean and seamless. There was very little to no tear out of the wood and the best thing is — it worked.
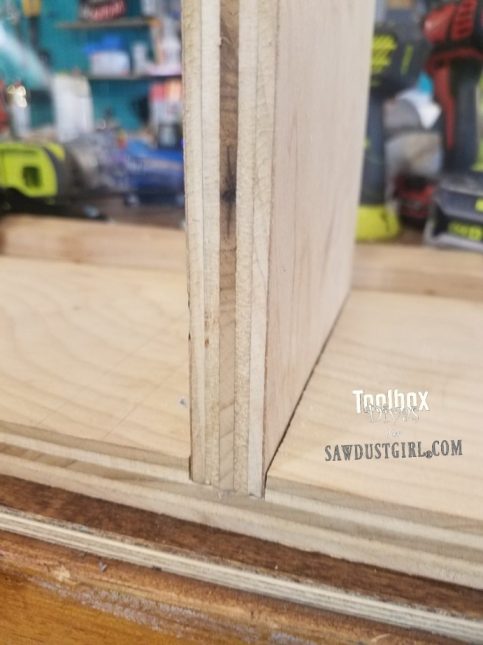
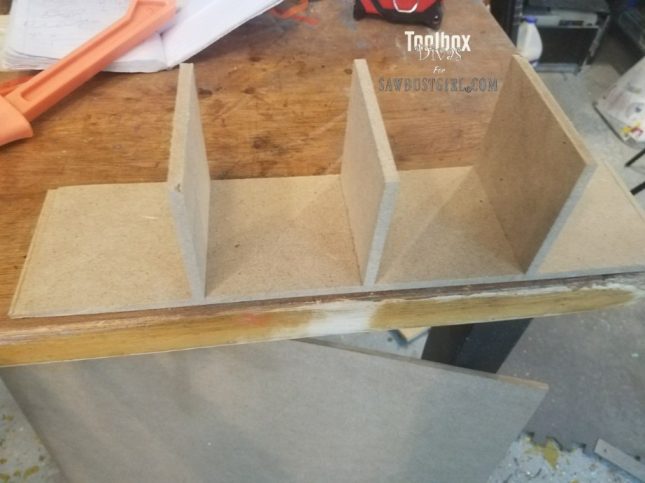
The problem was I causeless that the plywood that I was using was actually 3/4 in. And so my dado joint wasn't the tightest. And so in that instance, I learned never to assume that you really know the width of the piece of woods that you're working with. E'er measure information technology, so that you lot can create the perfect dado joint. An ideal dado articulation is about 1/4in. depth of the material and when you identify the material into the dado opening information technology should fit prissy and snug. Luckily this was just a test piece of woods.
In my project, I'm actually working with MDF and the material thickness is 1/4in. Before I got started, I did double check the thickness and I used a 1/iv inch router chip. And you lot guys nosotros had success. Again I actually have to give credit to those Bosch router $.25. Non simply did it cut plywood very well, squeamish and make clean; it cut this MDF flawlessly. This was my kickoff time working with MDF. I wanted to sample it and test it out a lilliputian bit to see how the properties of MDF differ from plywood and from pine. So this was a flake of an experiment for me with both using a palm router to create dados and with using MDF. I love how information technology all turned out. I will definitely apply my palm router once again in the future to make dado cuts.
If I do this once again, I probably would not create so many moving elements of the jig. I only had ane area that was a straight xc-degree angle everything else moved, which meant that I had more flexibility. However, it also meant that I had more than areas that I had to foursquare up. So set upward of my jig takes a little longer than I would have liked, but its zip compared to the time it takes to pull out my router table. I will probably tweak this jig a niggling more every bit I go along in the futurity. However, it'south a really great elementary solution to creating dados for dado joinery. And I would love it if yous accept any tips or any feedback that would assist in hereafter enhancements for this jig.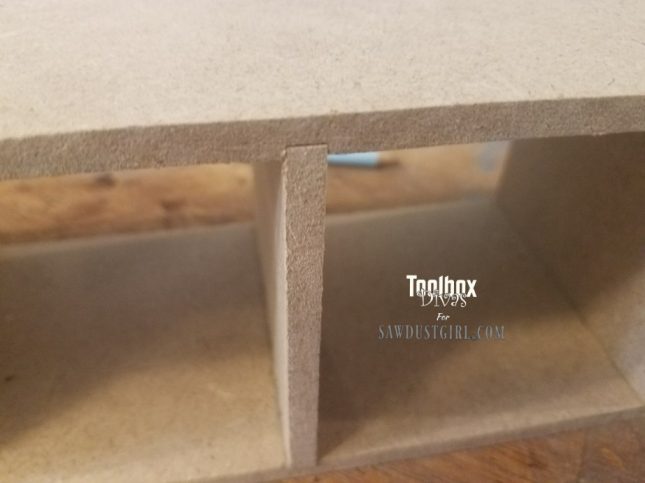
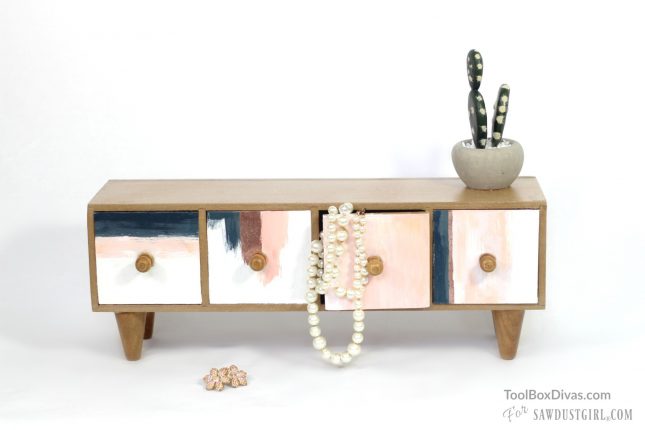
Bank check out what I created using the new dado jig. It's Every Girl's Dream Jewelry Dresser. Alright Guys, Till next time. ~T.

What Size Router Bit For Dado Jig,
Source: https://sawdustgirl.com/dado-jig-for-palm-router/
Posted by: williamswelice.blogspot.com
0 Response to "What Size Router Bit For Dado Jig"
Post a Comment